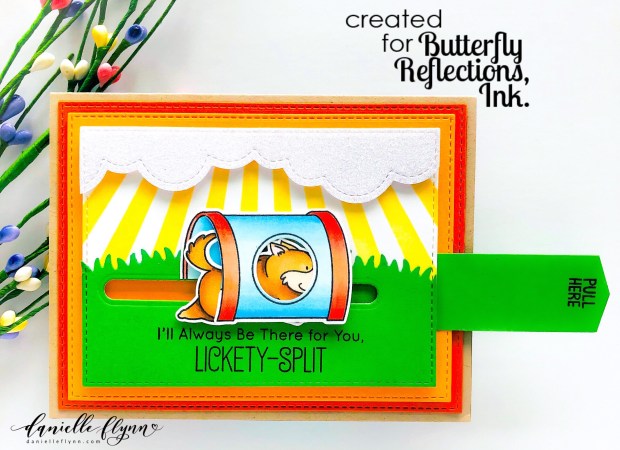
Happy Tuesday everyone! I am up on the BRI blog today with a fun interactive card featuring the new My Favorite Things Best In Show stamp set. This was super fun to make and such a cute stamp set!

I started off with my main panel and using the new My Favorite Things Ray of Light Stencil and Distress Ink Oxides in Dried Marigold and Squeezed Lemonade. I then used the MFT Stitched Cloud Edges die and ran through my die cutting machine with glitter cardstock to create some clouds. For my grass I used the MFT Die-Namics Grassy Fields die with some green cardstock. I stamped one of the cute sentiments that comes with this set on the bottom of my grassy panel. I adhered my grass directly to my stenciled panel using permanent adhesive tape. I adhered my clouds using foam adhesive for some dimension. I then had the idea of having the dog “run” through the tunnel. What is great about this stamp set and coordinating dies that the particular die for this image cuts out the window of the tunnel for you!
I stamped each image using MFT Extreme Black ink. I love this ink because it leaves a crisp solid image on the first press! I then colored each image using various copic markers and cut out using the coordinating dies. Once I decided on placement of the tunnel and where I would want the dog and pull tab, I used the MFT Spin and Slide Channels die and ran through my die cutting machine. This is a great die because it comes with different sizes to choose from to accommodate your project. Next, I adhered my dog image using MFT Slider Elements which fit perfectly in the channel that was created. I then created my pull tab using MFT Interactive Pull Tab die and ran through my die cutting machine using the same green cardstock as I used for my grass. I attached my tab underneath the grass and to the other side of the slider element that was attached to my dog. I then cut a slit in the tunnel image so he would be able to slide through the tunnel. I adhered some foam adhesive on the the back of my main stenciled panel to give room for the pull tab to slide with ease.
Once it was sliding with ease, and I have to say the enjoyment that I had once I saw it slide from start to finish!! I must have slid it at least 100 times! Because it already had foam adhesive on the back, I attached it to the lighter orange layer. I attached all the of my layers together and adhered to my card base using permanent tape adhesive.

I just love the way this card turned out and I hope it inspires you to try an interactive card! This was so easy and fun to make!! Make sure you stop by the shop to pick up this set and check out all the other fantastic goodies she has in stock!! See you all next Tuesday! Have a fabulous week! xoxox
♥♥♥♥♥♥♥

Beautiful Danielle. 💜
LikeLiked by 1 person